Easy Peasy Lemon Cake.

This is one of those throw it all in the mixer and she’ll be right mate kinda cakes!

You do have to follow the ingredient list as there is a method to the madness in how this all works out and it comes out mixed and ready for your cake tin!

I have used this recipe many times and added lemon or lime curd as a filling, frosted with meringue frosting and torched, or just the basic lemon – icing sugar frosting, as a Sole yacht chef at times you are really up against the clock to get things made and out on tight time frames so these easy quick cakes are my go to during those times.

This cake also works well as cupcakes or mini loaves, I have also baked it in a thin layer and used pieces as a base to build desserts on. It really is such a versatile cake.

What you are going to need here and let me tell you again its very important to stick to the order of what’s going on here…the ingredients need to go into your whizz in the order they are listed here.

120grm softened unsalted butter

1 cup plain AP Flour

3 teaspoon Baking Powder

2/3 cup Castor Sugar

2 Eggs at room temp

4 tablespoons of whole milk

grated rind of 2 lemons, juice of 1 lemon.

Preheat your oven to 180’C.

Grease and Line your baking tin, can be any shape your heart desires! Or a cupcake pan.

So what your doing here is put the ingredients into the whizz/food processor in the order they are listed.

Blend for 15 – 20 Seconds MAX!!

Pour the mix into your tin and bake for 20-25mins or until cooked through.

Now the world is your oyster and you can decorate the cake however you wish.

If you need any hints or tips or ideas on how to decorate, please reach out.

with love now and always

Cupcake xxx

Chocolate Zucchini Cake.

Ok so even if you are not the biggest Zucchini/courgette fan trust me when I say you will enjoy this cake, it is seriously that good.

As a yacht chef always trying to find ways to get the people to eat vegetables in some form this was my trick for using up the zucchini.

I always ask the Crew what kind of cake they would like me to make as the Chef I feel its the least I can do when people are far away from friends and family for their birthday. I will never forget the first time got asked to make a Zucchini cake in the shape of cat while crossing the Atlantic Ocean. Never a dull moment while working on yachts thats for sure!

What your going to need here to make this delicious cake is:

2 cups castor sugar

1/2 cup unsalted butter softened

1/2 cup canola oil

1 tsp vanilla essence

2 large eggs at room temp

2 1/2 cup all purpose flour

3/4 cup cocoa powder

1 tsp Baking powder

1/2 tsp baking soda

1/2 cup sour cream

2 1/2 cup grated zucchini

1 cup chocolate chips

Start by pre heating the oven to 325’F / 150’C

So what your going to do is beat the butter, sugar, oil, and vanilla with an electric mixer on high until fluffy – this should take about 2 mins

add the eggs and beat until incorporated – 15 secs

For step 2 what your going to do is

Sift together the flour and cocoa powder, baking powder and baking soda.

Add the flour mixture to the butter mixture alternately with the sour cream, start and finish with the flour, beating well on low after each addition. Stir in the zucchini and chocolate chips pour into your greased cake pan and smooth out the top.

Bake in pre heated oven until cooked about 45-50 mins

cool completely in the pan.

While the cake is cooling prepare the frosting.

you can make a brown butter frosting is that is your think, or you can try this one…

1 packet of cream cheese at room temp

1/4 cup butter softened to room temp

icing sugar to taste ( I often leave out as the cake is sweet enough)

1 tsp vanilla

1/4 tsp salt

8 TBSP chopped pistachio your going to mix some into the frosting an use the rest as garnish on top.

Take the cream cheese and add to your mixing bowl using a paddle attachment mix for 15 sec, then add in your room temp butter and icing sugar if you are using it mix for 1 min until all well combined add in the vanilla, salt and pistachio whip up a little longer then cover the cold cake with frosting and sprinkle with the left over pistachio.

Enjoy!

Any questions please get in touch

as always happy baking

love cupcake. xxx

Halfway party!

Its official, today is day 7. That means I’m halfway through this isolation journey and this time next week I’ll be allowed out and about in beautiful NZ.

My countdown order of all the kiwi snacks!

Some hot tips for those of you that might be doing this journey….

I flew from Miami Via LAX down to Auckland. Leaving Miami it was very quiet but just an internal flight as normal, you don’t get snack though and there is not much open in the airport, so if you get hangry I’d suggest brining some snacks! Once out in LAX I changed terminals and re checked in with Airnz for my boarding pass etc, this is the first time the voucher was really understood and looked at.

  • Bring your own Cutlery. I have my Chef knife roll with me, ok maybe a bit excessive but I always travel with them! I also ordered some plates online once I got here as I wanted to play with my food. It does get a bit tiring eating out of the takeaway box all the time. You can order from Countdown or the local supermarket depending on your location. I got some coffee/ yogurt/ biscuits/ NZ chocolate etc. Treat yourself!
fried chicken with mash potato, garden salad with crispy broad beans.

  • Bring more plugs or a power board… or adapters. I’ve been in the USA for a while (which is 110v) and only have 1 NZ plug these days, a lot of my devices etc work via USB plug so thats been a lifesaver! Something to think about if you use lots of plugged in things!

  • Download Netflix or books etc before you get here. The wifi is amazing but once everyone is trying to do that same thing you’ll find the wifi will drop out a bit, the Hotel does give you a SIM card so that helps.

  • Get a routine, this has helped me so much in the transition, I’ve been up early around 530am then by 730 dressed and ready for the day, well breakfast arrival!
sunrise out my window.

  • Get outside if you can…the first 3 days you can’t do much, until that first test you kinda stay in your room, we did have access to the play pen out the front of the hotel, and a service ramp which we could book for 30min slots. After that first negative test we could go to the rooftop area for 40 mins and take a bus to walk in a field for 45mins every 2nd day.
Outside Field walking area.

  • Bring a speaker, if your into music its nice to listen via a speaker rather than your device. If you’re into watching Netflix on the TV bring a HDMI cable, I’ve not tried this, don’t know what this is, so can’t offer any more info on this.

  • Don’t put too much pressure on yourself….I honestly am not sure how the last 7 days have gone by, I’ve finished one book, watched a lot of Christmas movies on Netflix, had a lot of video calls , chats with friends and family. I had a list of things to do when I was in here, I’m not going to finish that and I’m ok with it as this experience is difficult enough without feeling bad for not learning a new language or writing a book etc!

Any questions please give me a shout. I’m here and have the time to reply.

Follow my instagram for how I’ve been replaying my meals!!

Have a lovely day

with love always

Cupcake xxx

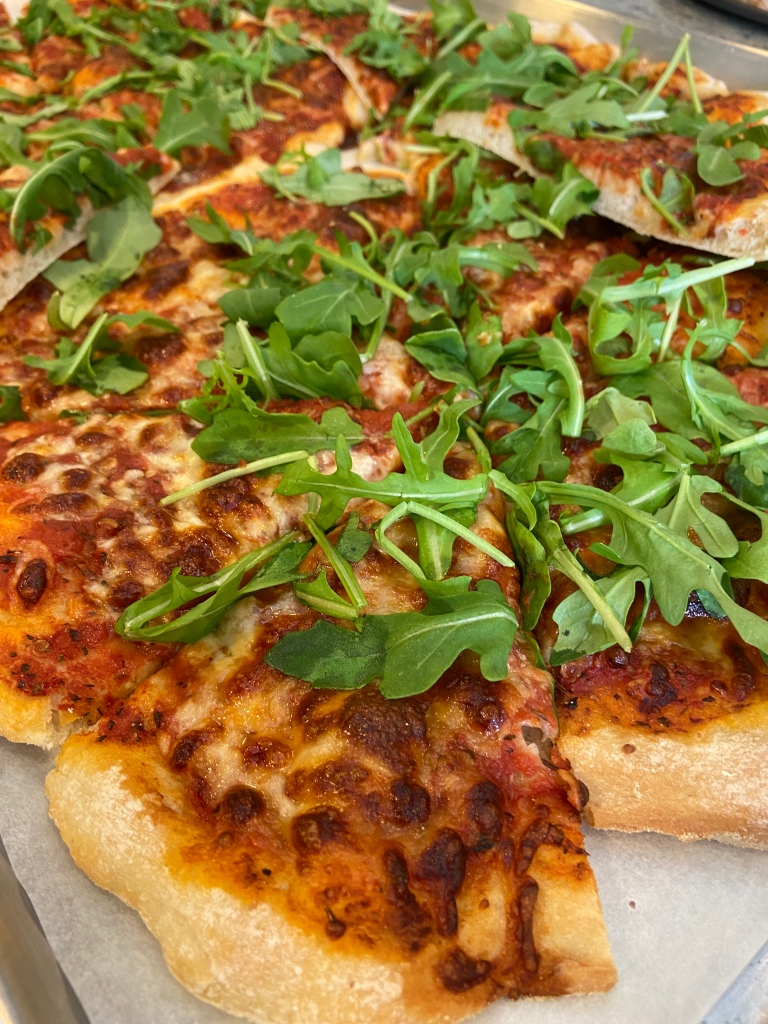
Sour dough Discard Pizza.

Since I’ve started on this journey with my Betty I’ve collected the discard from each feeding to create something else with along the line.

Sometimes Yacht Chef life is busy and trying new things takes more time..so I’ve not been all that inventive with my options, so far sourdough discard pancakes and sourdough discard pizza are my winners.

This pizza dough takes some time so its great to get it started early In the day before things get too crazy and use it for crew dinner or a side with dinner in the evening, I know as a Sole Chef having little tips and tricks like this in your kit are so useful.

Ok you are going to want to start this 5/6 hrs earlier than you want to use it…it takes some time to rise.

What your going to need here is

1/2 tsp instant – dry yeast

2 1/2 cups plain all purpose unbleached flour

1/2 cup Luke warm water

1 teaspoon of salt

1 cup of Sourdough discard

First of all lets mix up the sourdough discard and mix all the liquid in so that its all looking combined again.

Add the water flour and salt yeast in to a bowl of your stand mixer, add in the sourdough discard, mix to combine then knead with your hook until the dough wraps itself around the hook and cleans the side of the bowl, this will take 6-8 mins I’d say.

Place the dough into a greased bowl, cover and leave to rise until almost doubled in size. Depending on your starter this could be quick or take a little longer, you can also use double the active yeast if you wish to speed up the process. It should be ready in 3-4 hrs.

Once the dough has risen then you can shape your pizza and let the dough rest for 15 min before topping with your favorites.

This recipe should make 2 thin crust pizza, about 12″.

Enjoy and Happy Pizza baking.

With love always, Cupcake xx

Vegan Garlic Naan.

Trust me you won’t know that these are vegan…the vegan butter options are so good!

Naan bread is always a winner and takes me back to India every single time.

Make them today!

What your going to need here is:

2.5 teaspoon active yeast

1 teaspoon of sugar

1/2 cup dairy free milk

1 -1 1/2 cups warm water

3 1/2 cups unbleached plain flour

1 tsp salt

1 Tbsp vege oil

Place the yeast in a large bowl of a stand mixer add in the sugar and dairy free milk along with 1/2 cup of the water.

let the yeast mix stand for at least 5 mins until it starts to bubble and look frothy- bloom would be the word here!

Add in the flour and salt to the bowl and begin to knead slowly until the dough comes together in a ball thats slightly sticky, you may not need all the water so don’t throw it all in at once.

drizzle the oil over the dough and toss and leave covered to rise for about an hr or until almost doubled in size.

After the dough has risen turn it out onto a work surface and knead lightly, form into a disk type shape and cut into even pieces, roll each piece into a ball and leave to sit on the bench while you make the garlic butter mix.

I use vegan butter, here and just kinda melt as much as I feel I will need – 200grm for a big batch..possibly more ( can always let is set in the fridge and use on other delicious meal options!) grate in a lot of garlic!! sometimes I add in some fresh herbs, maybe some finely chopped parsley etc.

roll out each of the balls in to a mini pizza shape and heat a large frypan to medium, fry each piece till it puffs up and golden and bubbly on both sides, I then place in a tray and brush with garlic butter, when you’ve finished them all you can flash in the oven for a quick little re heat or serve straight away! deliciousness!!!

As always any questions, comments or feed back please get in touch.

Cupcake xxx

Cinnamon Buns.

IMG_1225

These are so DELICIOUS! they have become a Sunday 10am event.

I just woke up one day and was craving a cinnamon bun to have with my Sunday coffee so this is how we ended up here.

I’d suggest you start by taking out your cream cheese and butter to soften for the topping as these are rather quick to prepare, its just over an hour start to finish.


So what your going to need here is:

1 cup water water

3/4 cup butter milk heated to Luke warm in the microwave or on the stove top.

3 Tbsp of instant yeast

1/2 cup castor sugar

1/4 cup canola oil

1 1/2 tsp salt

2 eggs

1/4 cup wholemeal flour

5 cups of plain flour, maybe a little more, kinda just a figure it out as you mix it up!

For the Filling you will need

1 cup castor sugar

3 Tbsp ground cinnamon

100grm melted butter

ICING

I like a decent dollop of cream cheese frosting on my cinnamon bun!

1 8oz  packet of cream cheese   leave out to soften while you make the buns

100 grm butter at room temp

1/4 cup icing sugar

vanilla essence.


So in your bowl of the stand mixer your going to combine the warm water and the buttermilk, yeast and sugar along with the oil and leave to sit for 5-10 mins until it gets bubbly, trust me you’ll see the bubbles kicking off.

Once the bubbles appear you can add in the salt, eggs, wholemeal flour and 2 cups of the flour, mix up with the dough hook of your mixer, once combined add in the rest of the flour slowly until you get a nice soft dough, that’s still a little sticky to the touch.

I turn the dough in a little oil then cover with glad wrap and leave to sit for 10 mins maybe 15mins if your kitchen is cold until the dough has risen.

Once the dough has risen I flour the surface of the bench and roll out into an oblong shape probably about 2cm thick.

From here you are going to brush on the melted butter and then sprinkle over the cinnamon and sugar mix from the filling list.

Once this is done you  roll up gently into a log shape.

Now line a tray, with baking paper, they do spread out a lot, keep them 1-2cm apart for softer buns or further if you want some crunchy edges.

You cut the rolled up log into 2cm lengths and lay on the tray, tucking the loose edge in as much as you can, or place the edge so it proves into the side of the other buns if that makes sense.

I then take all the sugar bits that fell out during cutting and top the buns with them.

Leave the buns to prove one last time for 15 mins in a warmish spot before cooking, make sure your oven is hot at 375’F – 185’c.

Place your cinnamon rolls in the oven and bake for 15-20mins, check half way as all ovens vary in cooking time.

While the buns are cooking, beat your softened cream cheese and butter together adding in the icing sugar to make a smooth frosting.

Once the buns are cooked let them cool for 10-15 mins so the icing doesn’t just run off straight away, once cool to the tough smother the cream cheese frosting generously over those buns.

Enjoy!

Sending you love always, any comments or questions please get in touch.

Cupcake xx

Apple Cinnamon Loaf

IMG_0988


Hello, I know its been a long time since I posted, I’ve been rather busy.

Standby for an update on what I’ve been up to soon, until then why don’t you bake some of this  Apple Cinnamon loaf and enjoy it warm with some custard, or ice cream.

Happy Weekend to you all.


So what your going to need here is:

1/2 cup brown sugar

1 1/2 TBSP cinnamon

2/3 cup castor sugar

1/2 cup – 4 oz butter room temp

2 eggs

2 tsp Vanilla

1 1/2 cup All Purpose flour

1 1 /2 tsp Baking powder

1/2 cup milk

1 large Green apple, peeled and finely chopped.


So what your going to do here is start by heating up your oven to 180’c

Mix together brown sugar and cinnamon in a bowl. Set aside.

In a stand mixer combine castor sugar and butter mix till smooth

add eggs and vanilla, continue to beat on medium until combined.

Add Flour and Baking powder then slowly add in milk, gently mix to combine.

In your greased, lined loaf pan, pour in half of the mix then top with some of the cinnamon sugar mix, I like to be quite generous in the middle, what ever is left is going on top  of the loaf.  Then pat into the batter with the back of a spoon half of the chopped apple pieces.

Place the rest of the batter on top of the apples and repeat with the remaining ingredients. Finish with a generous sprinkle of the cinnamon sugar mix.

Bake in your preheated oven for 50 mins until cooked through.

Enjoy warm with custard or Ice cream.


As I’ve always said any questions or comments please feel free to get in touch.

Happy Baking

love always

Cupcake. xx


Triple Chocolate Brownie.

Ok folks there is no picture here due to my technical challenges!

Don’t ask! but if you’ve seen my instagram you know they are delicious looking! (@cupcakeatsea)


What your going to need here is:

100 grm butter

1 cup castor sugar

2 eggs

3/4 cup plain flour

1 tsp baking powder

1/2 cup cocoa powder

125grm dark chocolate

125 grm white chocolate

I have also added, handful of freeze dried raspberries, sleeve of crushed up Oreos. So many options here! just think about how much you put in as it might change the moisture etc in the recipe. – you can also just go with the chocolate, so good!!!


So what you are  going to do is heat your oven to 175’c then line your baking pan with paper or grease well.

Start by melting the butter in a saucepan gently once melted remove from the heat add the sugar and whisk together let cool for 5 mins or so then add in the eggs and whisk well.

Let cool again for 5 mins then sift in your dry ingredients add in your chocolate and any extras you feel like! gently fold to combine the mix.

pour into your prepared tin and bake for 15-20 mins, I undercook these so they are super gooey and delicious day one then still nice and soft on the following days, if they last that long!!!

Enjoy!

when I work out my technical issues I’ll add the pics of the variations I have made.


with love always

cupcake xx

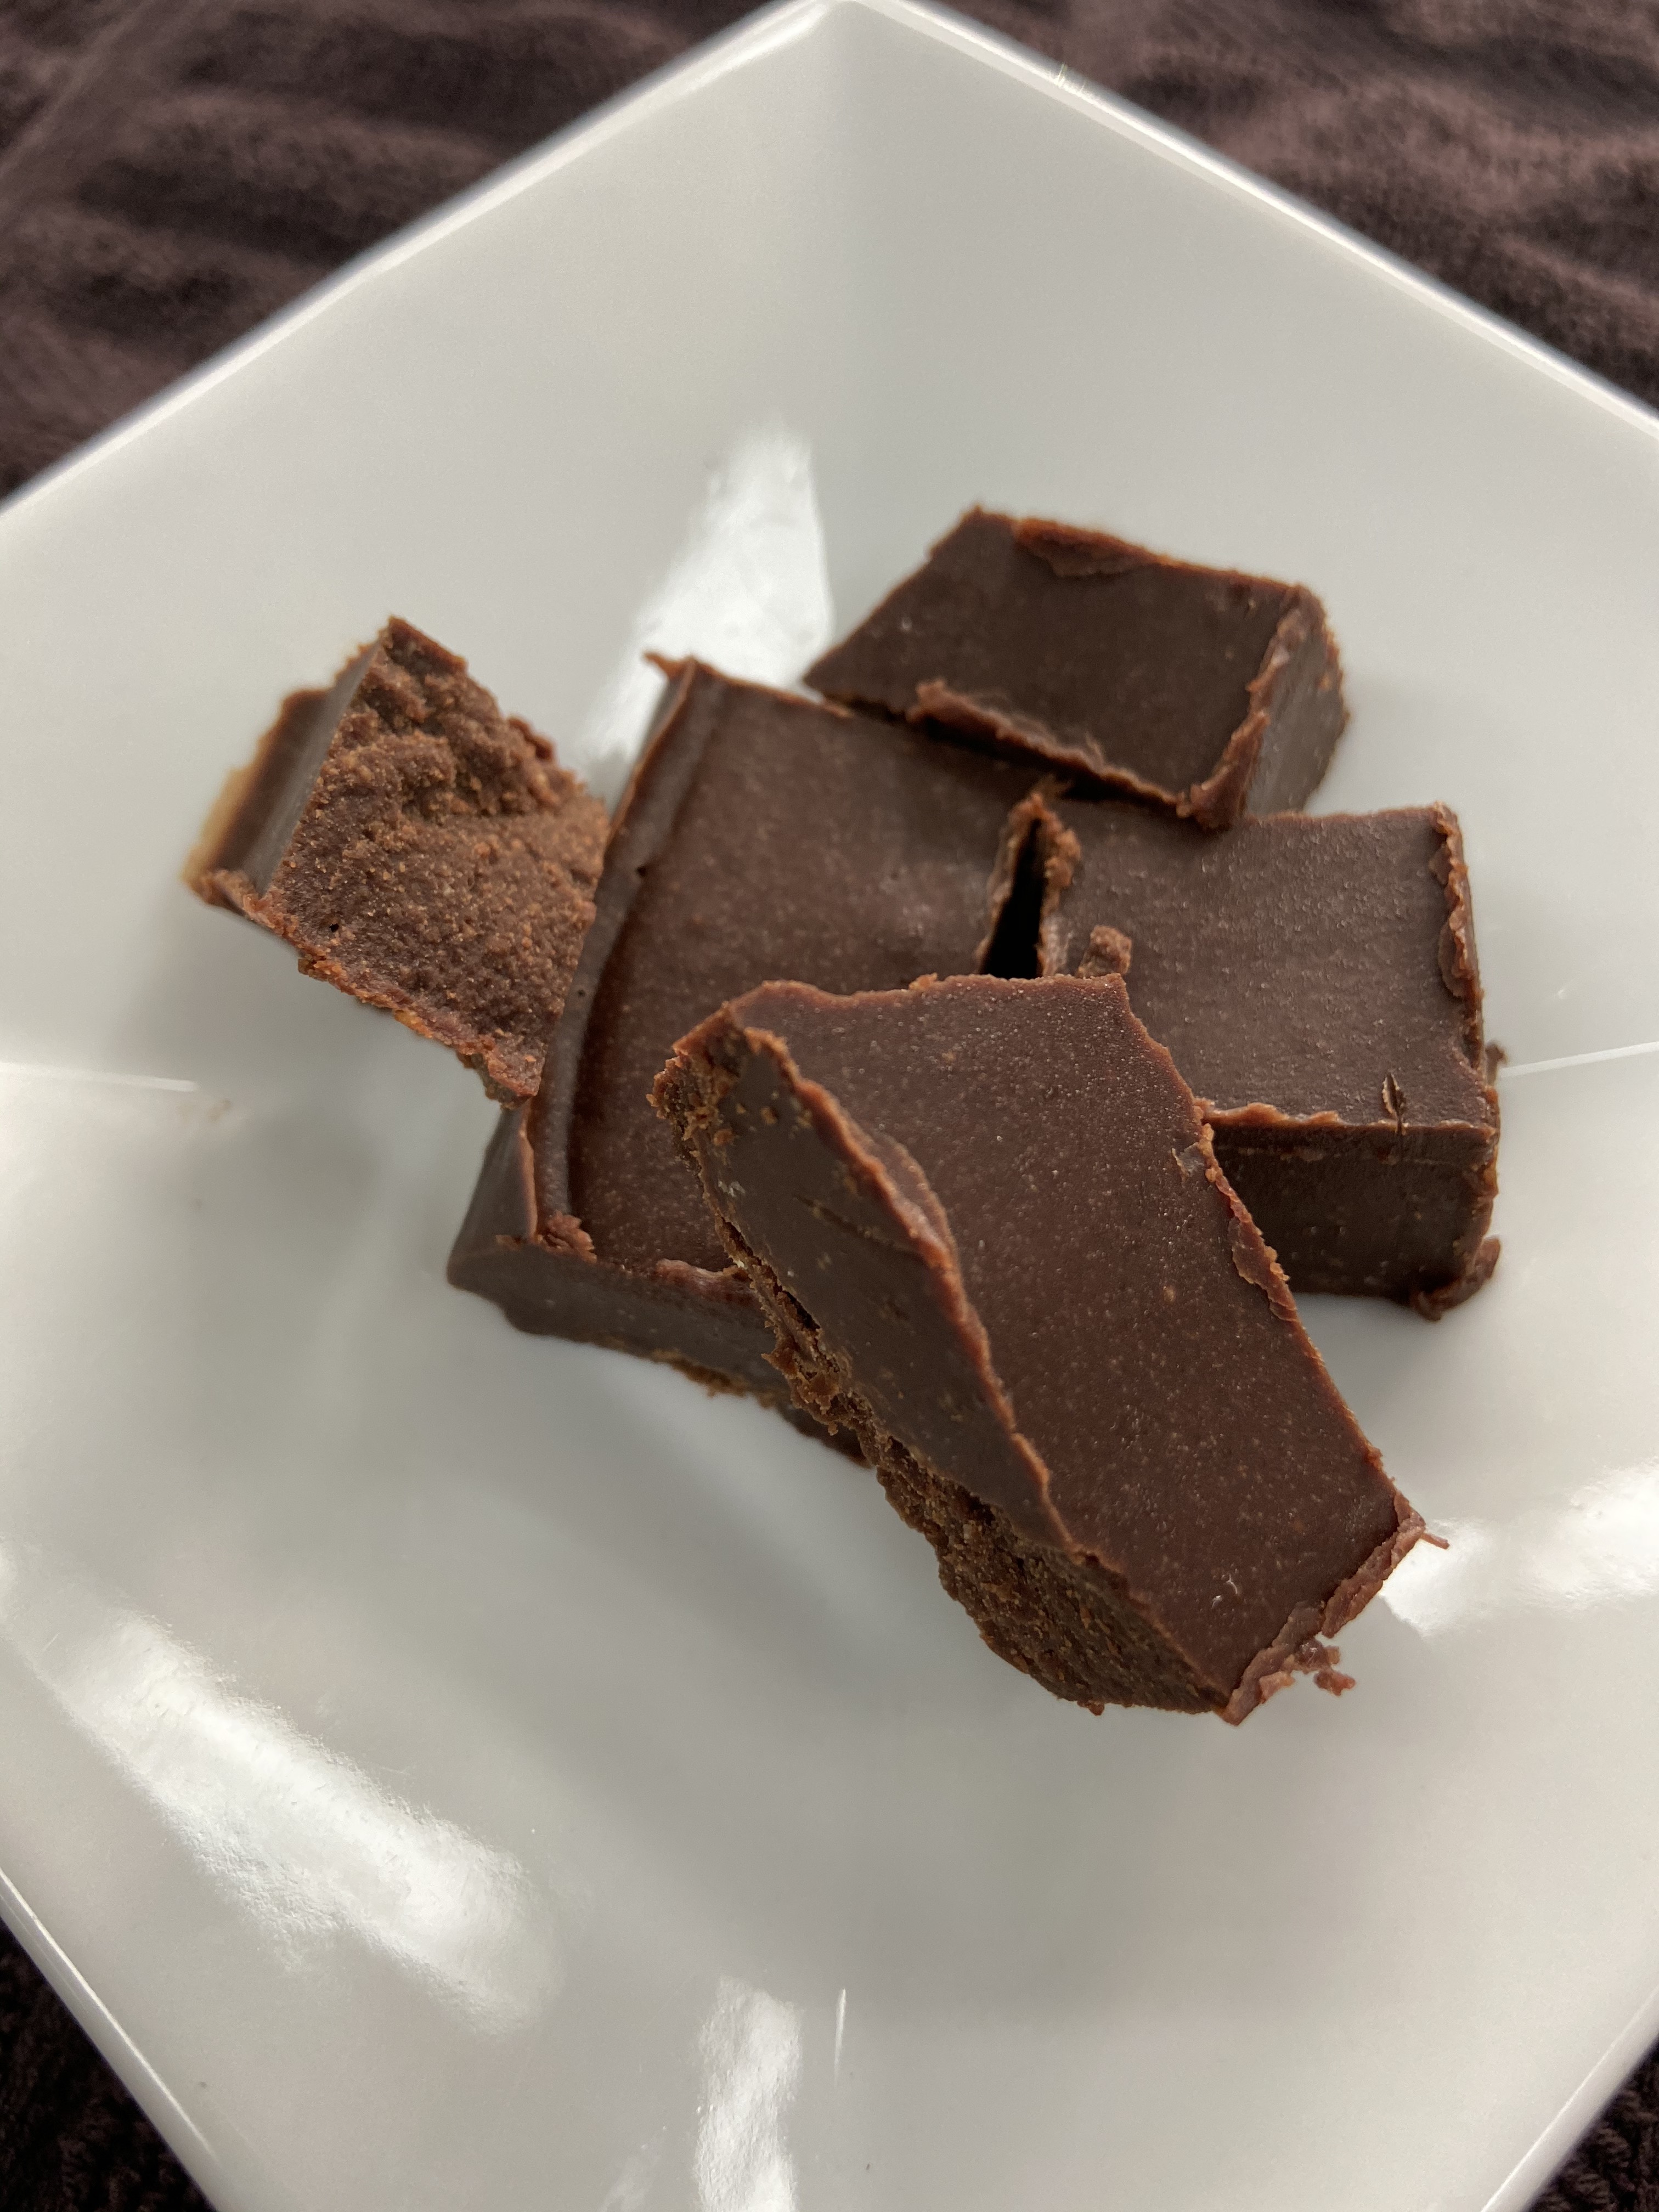
Paleo Fudge.

IMG_9191


This Paleo Chocolate Fudge is super easy and also rather delicious.

You do need to keep it in the fridge once it is set, but trust me it won’t last long.


So what your going to need here is:

1/2 Cup coconut oil

1/2 Cup cocoa powder

1/2 Cup almond butter

1/4 Cup maple syrup

1/8 tsp salt


Place all the ingredients in a small saucepan, heat gently to combine and whisk till smooth.

You don’t need to boil it at all.

Once smooth pour the mix into a lined loaf pan, let cool on the bench for a few mins then place in the freezer till set.

Cut into small squares place into a Tupperware and keep in the fridge.

So Delicious and guilt free treat!


This is always a winner!

Enjoy

With love today and always

Cupcake xx

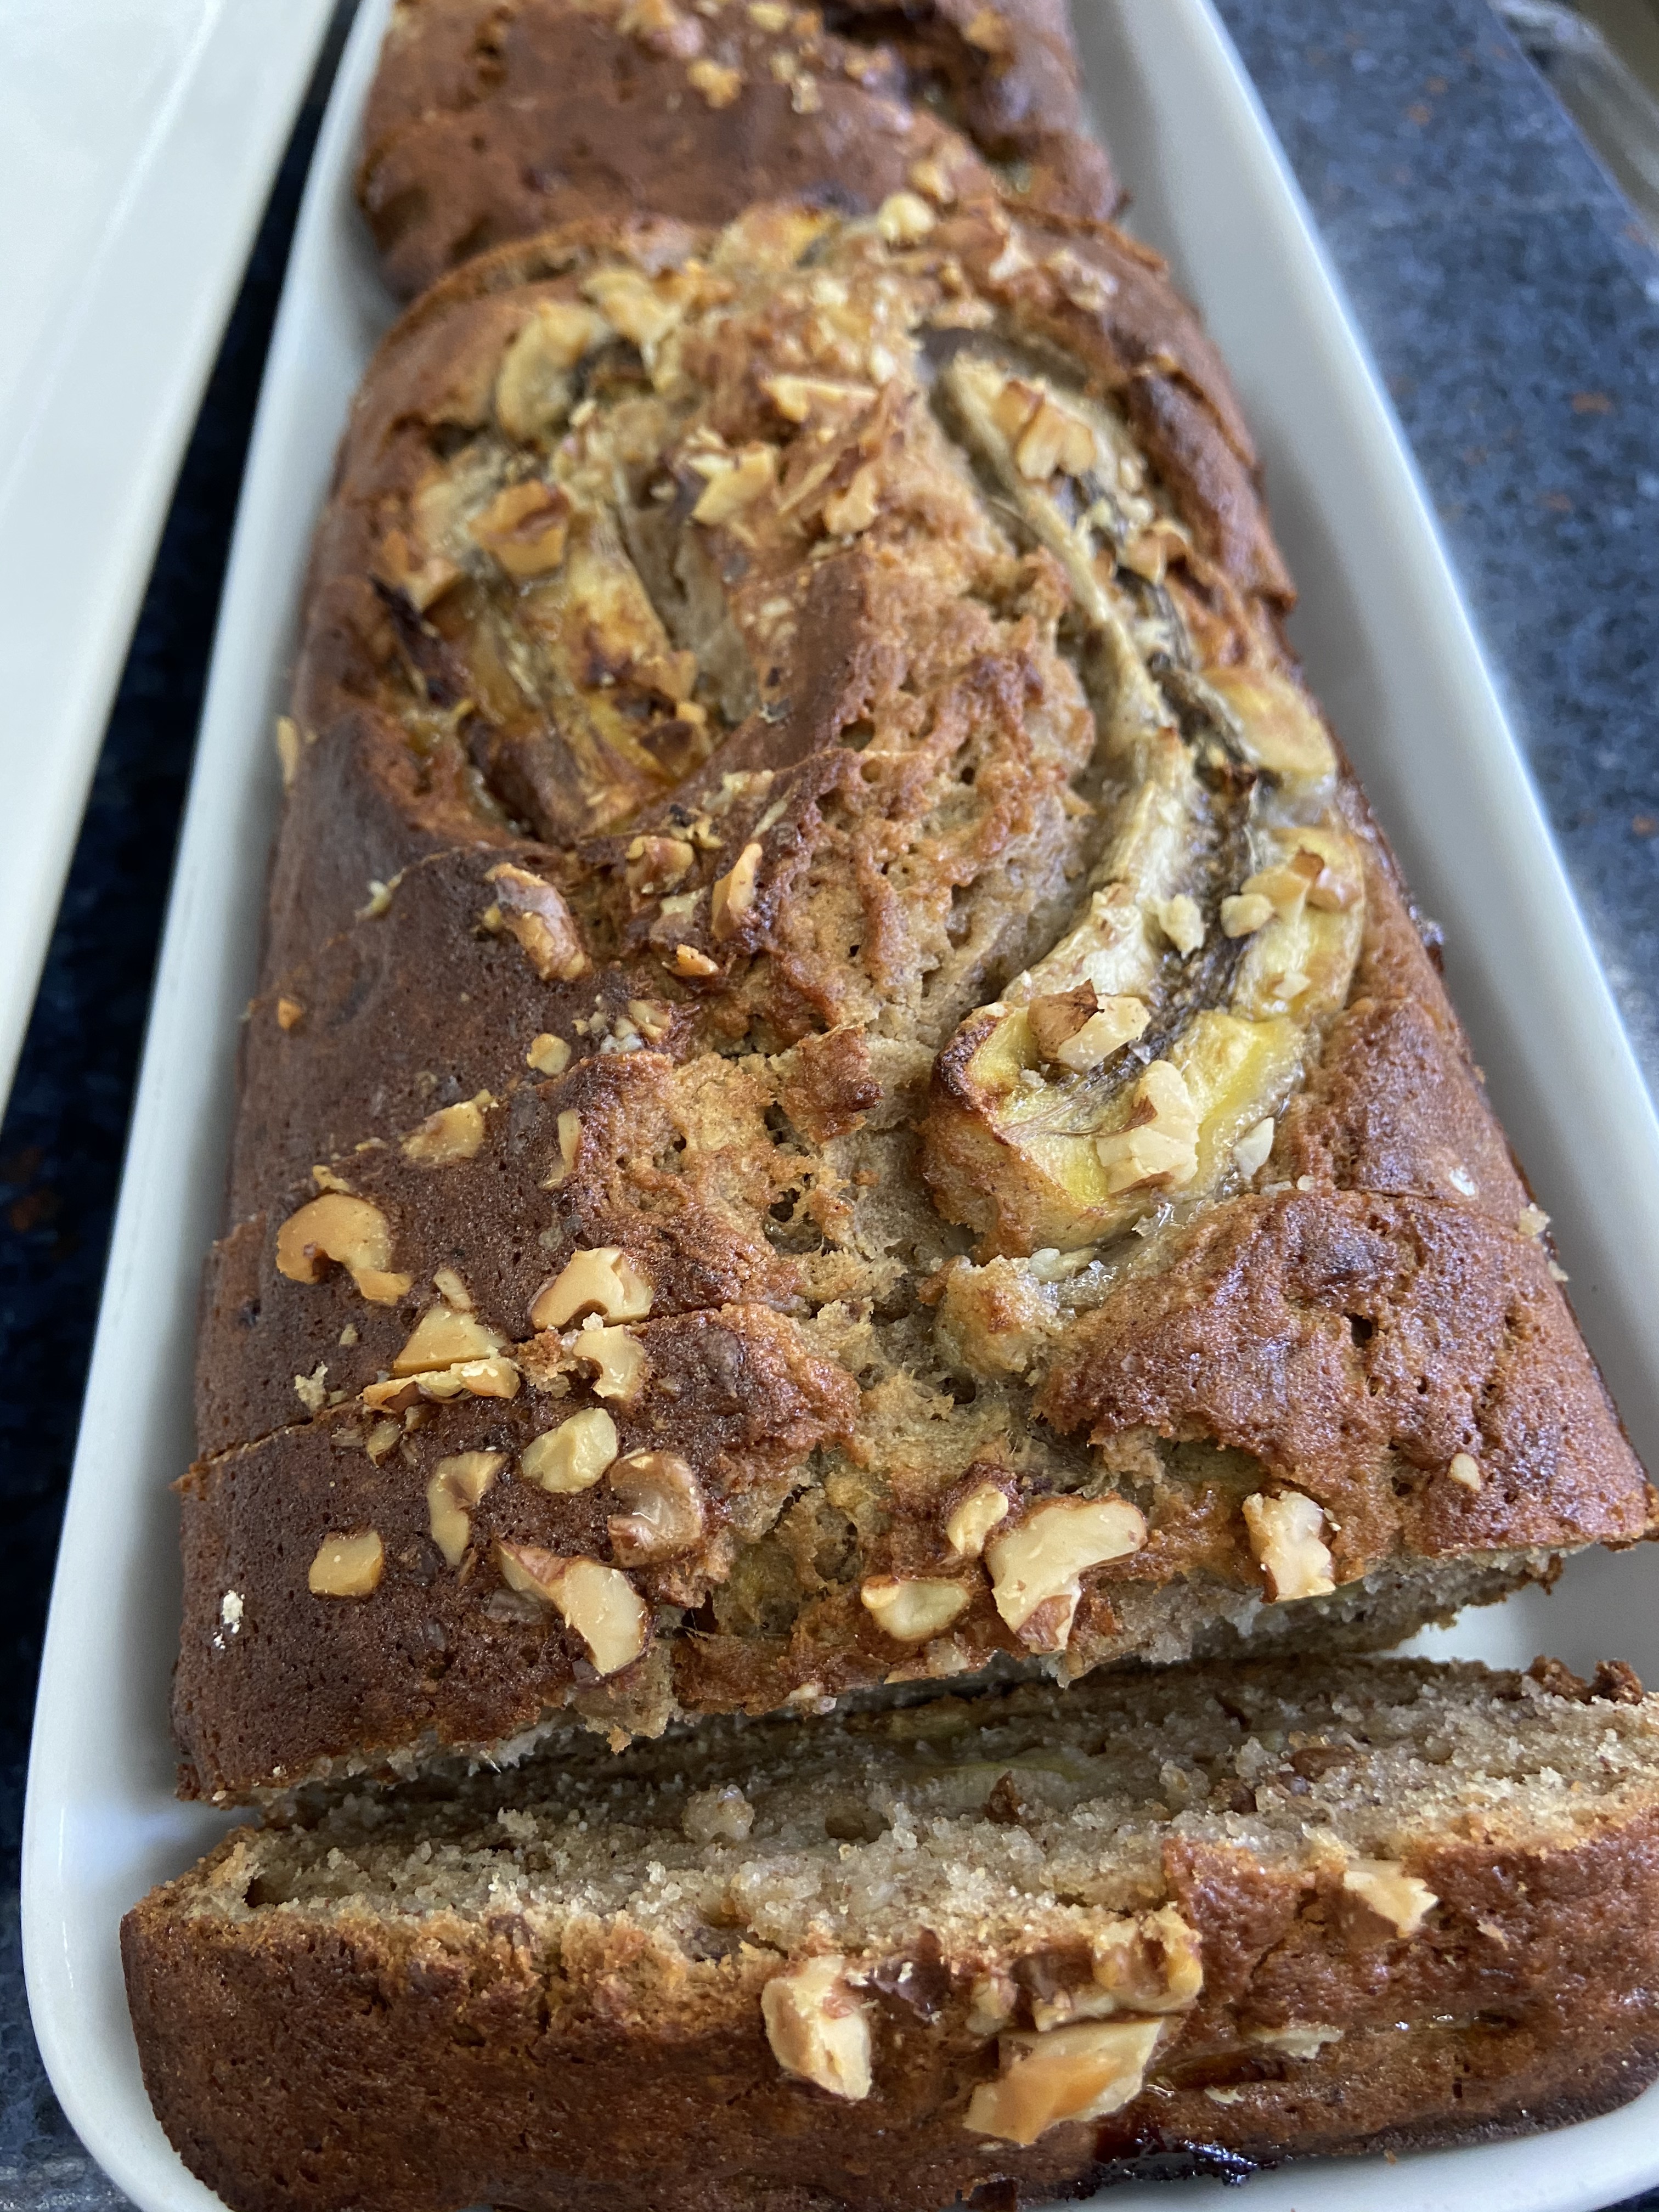
Cookie and Kate Banana Bread.

IMG_5268

This is one of those amazing recipes I stumbled upon in the world of Pinterest and I’m so glad that I did!

Its refined sugar, dairy free – there are eggs in there and I have not tried to replace them yet with a substitute…but when I do I’ll be sure to let you know!


So what your going to need here is:

1/3 cup melted coconut oil

1/2 cup honey or maple syrup

2 eggs

1 cup mashed banana

1 tsp vanilla

1/2 tsp salt

1/2 tsp cinnamon

1 3/4 cup wholemeal flour

1 tsp baking soda

1/4 cup hot water


So what your going to do here is:

Pre heat your oven to 165’c.

Grease and line your loaf pan.

In a large bowl beat the coconut oil, honey or maple syrup together add eggs and beat well.

Stir in the mashed bananas and vanilla then stir in the salt and cinnamon, lastly add flour and stir until just combined. Add baking soda to hot water and mix in to rest of the mix. Spread your mix out into your loaf tin.

Sprinkle over extra cinnamon or a slice banana.

Bake in the oven for 55-65 mins.

Cool for 30mins before cutting – I NEVER DO THIS! Its cut and eaten within 10 mins! Well not the whole lot but ya know quality control!!!


This is such a good breakfast option and a great way to use up those over ripe bananas no one wants to eat!!


Sending love as always

Cupcake xx